|
|
Lesson: Measuring the Motion of a CME Using NIH Image(Grades
9-12)
|
| |
|
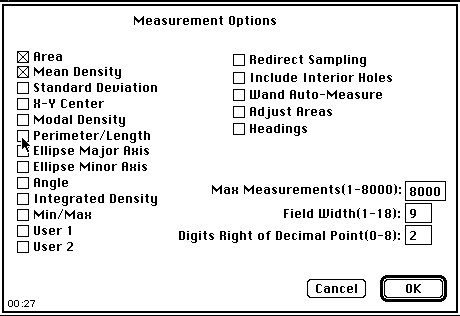
Click OK. |  |
|
|
|
When you go to ANALYZE and SHOW RESULTS you will see a screen like the one to the right. The first number is the area of the line and the second is the distance along the line. Remember that the first measurement you took was the length of the line and the second was the area of the expanding gas. We therefore do not need the first area and the second length. As stated before, we will change this later. Note that your numbers will not be the same as above. | 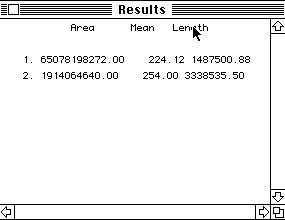 |
Created by: Dennis Christopher
Direct Comments to:
dennis.christopher@gsfc.nasa.gov
Last modification: Friday, 09-Nov-2007 11:33:35 EST